To do -Part 1
Developers may continue to build upon work with the OTBS using the topic reading to help with user registration and advanced login features from Hartl et al (2008).
generate a controller and an action by adding a method(s) to a controller.
create a view template for each action and to link to actions from views.
use AJAX to improve the user experience.
A. OTBS Registration.
A1. Create a model named user. (See figure 1).

Figure 1.
A2. Edit the file named 002_create_users file for auto generating table by rake migrate (see figure 2.)

Figure 2.
A3. Generate the user table (See figure 3.)

Figure 3.
A4. Create controller name user. (See figure 4.)

Figure 4.
A5. Edit the user controller (See figure 5), use AJAX methods- flash[:info] to show the registration result.
 Figure 5.
A6. Add validation in user model (See figure 6.)

Figure 6.
A7. Create a view page named register.rhtml with following code. (See figure 7.)
Use AJAX method -
"form_tag(:action => 'register') do" and "submit_tag" for performing the form subumition.
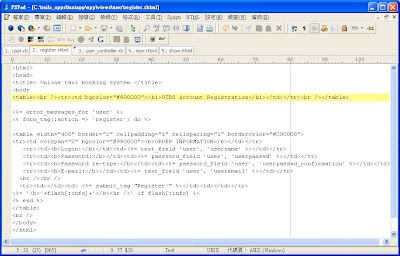
Figure 7.
A8. Restart the taxiapp project and use brower to navigate at http://localhost:3000/user/register (See figure 8.)
 Figure 8.
A9. Test the registration page.
a.) Input a null value.

b.) Complete the registration form and click Register button.

c.) Input the created account in the login field..it returns error because that user has already created..

A10. Use MYSQL query browser to check the user named wilson whether is created.
Yes, the account named wilson and his information has already stored in the database.
A11. Add the link which is used to go back to the login page.


 Figure 3. Passenger's show.rhtml page
 Figure 4. Passenger's edit.rhtml page.


 Figure 3.


